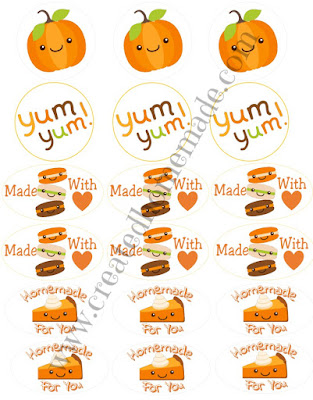
Fall is a great time for making homemade treats. If you love to bake or give homemade gifts, these Fall Inspired Homemade Labels are for you! The round ones are 2" which fits perfectly on top of a mason jar. The oval labels are perfect for the side of a mason jar or a beautifully tied cellophane bag full of treats!
Just click on the picture below to access your free files. They are available in either pdf or png. Just print on sticker paper then they can be cut with your cutting machine or by hand.
These cute images were purchased at The Hungry JPEG
Home / homemade
Showing posts with label homemade. Show all posts
Tortilla Warmer Tutorial
Just in time for Cinco de Mayo I've created this Tortilla Warmer Tutorial. Simply slide your tortillas inside then pop in the microwave for about 30 seconds. Your tortillas will come out nice and warmed!
*this post contains affiliate links
1/3 yard of muslin
1/3 yard of cotton batting
matching cotton thread
I used bright yellow fabric for the back of my tortilla warmer because I already had some in my fabric stash. However, you can make the front and back from the 1/3 yard print fabric.
- 2 from your print fabric
- 2 from your muslin
- 2 from your batting

Pin fabric, muslin and batting together in this order: batting, print fabric right side up, then muslin on top.

Sew around the circle with a 1/2 inch seam. Be sure to leave a 2"-3" opening for turning the fabric.

Next, trim the seam then clip the curves. I used my pinking shears to trim the seam then I clipped around the circle at about 2" intervals right up to the seam line. This helps the fabric lay flatter after you turn it. Be sure not to cut the stitching!

Reach inside the opening and turn it right side out so that the muslin and print fabric are on the outside and the batting is on the inside. Then you can either stitch the opening by hand or machine stitch it closed. Since this was just for myself I wasn't worried about making it look all nice and neat!

Repeat all of the above steps with the second piece of fabric, muslin and batting. Your will then quilt each finished piece by marking 1 ½" intervals on the fabric then sewing along those markings. Since my fabric was dark, I had to use a white marking pencil to make the lines.

Be sure to quilt both the front and back pieces.

Finally, sew the front and back pieces together with a ¼ inch seam, muslin sides together. You will sew about ²⁄3 of the way around leaving an opening to slide your tortillas into.

Happy Cinco de Mayo! Enjoy!
*this post contains affiliate links
Materials:
1/3 yard of cotton print fabric ( I used this chili pepper fabric)1/3 yard of muslin
1/3 yard of cotton batting
matching cotton thread
I used bright yellow fabric for the back of my tortilla warmer because I already had some in my fabric stash. However, you can make the front and back from the 1/3 yard print fabric.
Steps:
Trace circles on your fabric. I used one of my dinner plates which are 11" in diameter to trace the circles onto the material with a marking pen. Then cut out all of your circles.- 2 from your print fabric
- 2 from your muslin
- 2 from your batting

Pin fabric, muslin and batting together in this order: batting, print fabric right side up, then muslin on top.

Sew around the circle with a 1/2 inch seam. Be sure to leave a 2"-3" opening for turning the fabric.

Next, trim the seam then clip the curves. I used my pinking shears to trim the seam then I clipped around the circle at about 2" intervals right up to the seam line. This helps the fabric lay flatter after you turn it. Be sure not to cut the stitching!

Reach inside the opening and turn it right side out so that the muslin and print fabric are on the outside and the batting is on the inside. Then you can either stitch the opening by hand or machine stitch it closed. Since this was just for myself I wasn't worried about making it look all nice and neat!

Repeat all of the above steps with the second piece of fabric, muslin and batting. Your will then quilt each finished piece by marking 1 ½" intervals on the fabric then sewing along those markings. Since my fabric was dark, I had to use a white marking pencil to make the lines.

Be sure to quilt both the front and back pieces.

Finally, sew the front and back pieces together with a ¼ inch seam, muslin sides together. You will sew about ²⁄3 of the way around leaving an opening to slide your tortillas into.

Happy Cinco de Mayo! Enjoy!
Subscribe to:
Posts
(
Atom
)
Search This Blog
Powered by Blogger.
Blog Archive
- May 2025 (1)
- February 2025 (1)
- November 2024 (1)
- June 2024 (1)
- December 2020 (6)
- November 2020 (8)
- October 2020 (7)
- September 2020 (9)
- August 2020 (3)
- June 2020 (1)
- May 2020 (4)
- April 2020 (3)
- March 2020 (5)
- February 2020 (3)
- January 2020 (5)
- November 2019 (1)
- October 2019 (10)
- October 2018 (2)
- September 2018 (1)
- June 2017 (40)
- May 2017 (2)
Grammy Dee recently posted…Wednesday AIM Link Party #15
Sarah recently posted…Alfresco May Day LunchMother of 3
Mother of 3 recently posted…Weekly Wrap- Up: The Week Alec Made His Spring Cupcakes
Cassie Smallwood recently posted…Stainless Steel Appliances For $15
Jess recently posted…Cooking and Crafting with J & J Link Up #96 and #95 Features
Hugs,
Bev
Kileen recently posted…Sew a Coin Purse & Personalize It with Embroidery
Thanks for bringing your post to last week’s Pit Stop.
Janice, Pit Stop Crew
Janice Wald|MostlyBlogging recently posted…123 of the Best Free Blogging Tools that Will Save You Time Blogging (2017 Update)
Debbie Kitterman recently posted…The Sting of Rejection: Perseverance Series Part 4
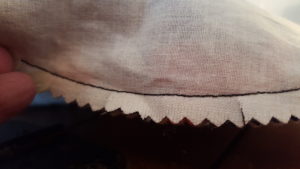
They also make great gifts!
The only thing I would add, is to only use 100% cotton fabric, thread and batting if you are putting these in the microwave. Using anything else could be a fire hazard.