Showing posts with label DIY. Show all posts

How To Print on Fabric

Would you like to make fabric tags to put on quilts? Or perhaps to use as a clothing label? Well once you learn How To Print On Fabric you can do both of those things! 

How to Print on Fabric


How To Print On Fabric


Materials:

Freezer Paper
White Fabric
Printer
Iron
Vinegar
Shallow Bowl
Steps:

Cut a piece of freezer paper to fit in your printer. You can use a piece of printer paper and trace around it to make sure you have the correct size. 

Iron the freezer paper onto the white fabric (one side feels more waxy, that side will go on the fabric) then trim the fabric to the same size as the freezer paper. Make sure there are no frayed ends on the fabric to get stuck in your printer!

How To Print On Fabric Collage 

Take the freezer paper and put it in your printer. For my printer I put the side I want printed on face down. So I put the fabric side face down.

Go to your computer and print the design you would like. 

Occasionally it will come out smeared. Just try again. The picture above took me 2 attempts! After it comes out, carefully peel off the freezer paper from the fabric being careful not to smudge the ink. 

How To Print On Fabric 1 

Fill a shallow bowl with vinegar - just enough to cover the fabric. Set your printed fabric in the bowl and let it sit for 5-10 minutes to set the ink. 

How To Print On Fabric 2 

After you take it out of the vinegar, rinse with cold water to get out the vinegar smell. You can either lay it flat to dry or you can use a hair dryer to speed up the process. 

I use some pinking shears to cut around the picture then I sew it on to my project. If it's a quilt I usually use my sewing machine but if it's clothing I hand stitch it on.


Beautiful Baby Girl Christmas Ornament

Do you have a new little one in your life this Christmas? Then this easy yet beautiful Baby Girl Christmas Ornament will be the perfect gift!


DIY Beautiful Baby Girl Christmas Ornament #sponsoredpost #DecoArt #ExtremeSheen from www.thisautoimmunelife.com #Christmasornament

Baby Girl Christmas Ornament **sponsored post**


Thanks to DecoArt for providing the paint for this project!
Materials:

1-3.25" translucent glass ornament
Extreme Sheen DecoArt paint in Rose Quartz
Small jewel stickers ( got mine at Dollar Tree)
Pink, white & silver ribbon in various widths
Sheer white/glitter ribbon
Pink and white feathers
Hot glue gun
Small paper plate

This ornament is so easy to make and looks just beautiful with the Extreme Sheen paint! I was provided with a set of Extreme Sheen paint from DecoArt for this project. I chose to use the Rose Quartz color as it is the perfect "baby girl" color!
Directions:

First, make sure your ornament is clean on the outside. I cleaned mine with an alcohol wipe. Then I used a yellow sharpie (so it wouldn't show through afterwards) and drew the initial "E" on the outside. Using the stick on jewels, cover the monogram. I also used the jewels to put "19" on the back for the year.

Take the top hanger part off of the ornament. Shake the bottle of paint to make sure it is well mixed. Then pour a little at a time inside the ornament around the edge. Start to swirl it around so it covers the inside of the ornament. Add a little at a time until you have enough inside to cover the entire ornament.

#DecoArt sponsored Christmas Ornament #ExtremeSheen #Christmas

Turn the ornament over onto the paper plate so that all of the excess paint will drip out. This took several days for mine so I occasionally moved the ornament around on the plate so it wasn't sitting in the drained out paint. If you have a heat tool you can use it to speed up the drying process.

While the paint is drying add the decor to the ornament cap. Tie one piece of ribbon around the top for hanging. I used a piece of white/glitter sheer. Take some strips of ribbon about 8" long and stack them together. Then tie them in a knot around the metal hanging part. Put a couple of small feather stems inside the knot. Add a little dab of hot glue to hold the knot and the feathers. Take 2 pieces of sheer ribbon and tie a bow. Glue the bow to the front of the knot.

Once the paint is dry inside the ornament, put the cap back on the ornament. Don't you think the metallic paint gives this ornament a beautiful finish!

DIY beautiful baby girl Christmas Ornament made with DecoArt paint from www.thisautoimmunelife.com #Christmas #ornament #DecoArt #babygirl


Quilted Christmas Pillow

Collaborating this month with a lovely group of Bloggers to bring you some new craft ideas. For the November Craft Destash we are challenged to create a project using only items currently found in our craft stash. We were to make something new with crafty supplies or re-make an item we've been holding on to for a while. For this challenge, hosted by Megan from C'mon Get Crafty,  I decided to make this Quilted Christmas Pillow.


Quilted Christmas Pillow for your holiday decorating from www.thisautoimmunelife.com #Christmas #Quilt #Pillow

I made this pillow for a sweet friend of mine. She is always so thoughtful and caring. I wanted to show her that I had been thinking about her and appreciate her friendship.
I had everything I needed to make this pillow. The red and green fabric I had inherited from my mother years ago. Really, I don't ever remember her sewing anything so I'm not sure why she had this fabric. I had purchased the white fabric about a year ago when it was on sale as I use a lot of it with my quilting. The embroidery thread is also in my stash as I used to do a lot of cross-stitch. 


Quilted Christmas Pillow


Materials for a 20" pillow:

2 green squares 6" each
2 red squares 6" each
4 red squares 6" each, in a different pattern
8 white squares 6" each
20" x 20" piece of batting
White material for back 
20" pillow form
Optional:
2 packs of red embroidery thread
1 pack of gold embroider thread
Directions:

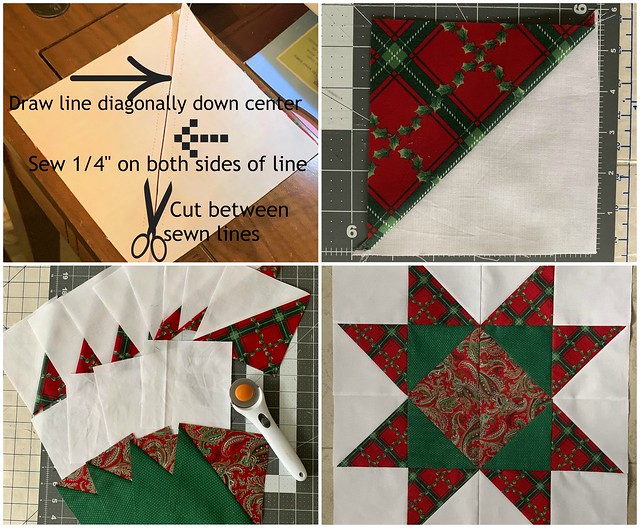
First you will be making "half-square triangles" (HST). To do that, take one white square and one red (outer) print. Place them with right sides together. Draw a line diagonally down the center. Sew a scant ¼" away from each side of the seam. Cut down the middle between the seams. This gives you 2 matching half square triangles. Repeat this with 3 more whites/reds. Then use the other red pattern with the green to create 2 more sets. Press these open pressing the seam towards the darker fabric. You will end up the 4 of the red/green, 8 of the white/red and will have 4 of the plain white squares left over.
Quilted Christmas Pillow Steps

You will notice that the white squares are a little larger than the half square triangles. Trim the white pieces down so they are the same size as the HST. Then start sewing your squares together in a scant ¼" seam. I sewed them row by row then sewed the rows together but you can do it however you like! Place the batting on the back and quilt however you like. I just quilted along my stitching lines which is called "stitch in the ditch". 

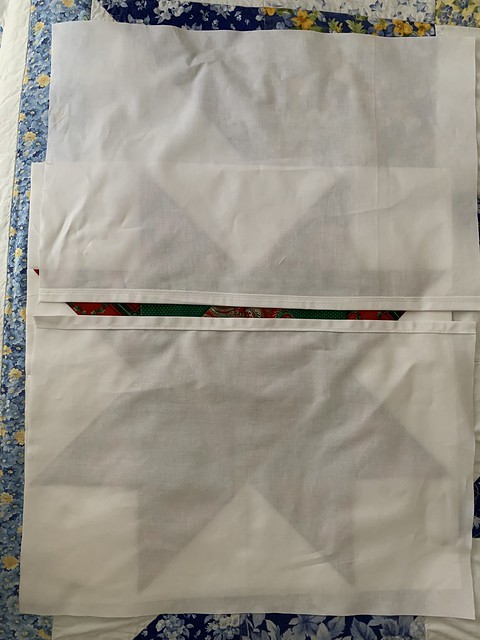
To make the back, cut 2 pieces of your backing fabric to measure 20" long and 14" wide. Make a narrow hem along 1 20" side of each piece. 
2019-10-18 14.19.10
Tassels

If you want to make tassels, you will use 1 pack of embroidery thread for 2 tassels. Tie a loop of gold thread around each end of the embroidery thread for the hanger. Take another piece of gold thread and tie very tightly around the ends to secure the loop thread. Cut across the center of the thread. Trim any loose threads. Then make another one of these.

Quilted Christmas Pillow Tassel

To put the pillow together, lay the quilted piece face up. Then put the tassels in each corner so that the tassel is laying on the quilted piece and the gold loop is laying off (you will catch the gold thread as you sew). Lay the backing pieces face down so that they overlap to make an envelope. Pin the edges then sew all the way around the outside edge in a ¼" seam. Make sure you caught the gold tassel thread. I put a knot in the thread right by the corner seam to help hold it. Press the seams to one side then turn right side out.

Finally add the pillow form and it's ready!


Quilted Christmas Pillow to decorate your home for the holidays from www.thisautoimmunelife.com #Christmas #quilt #pillow


For last month's challenge I made this Fall Market Tote.

Free Printable Christmas Puppets For Kids

Do you need a Christmas craft to keep your kids busy?  Download these Free Printable Christmas Puppets for Kids and let them start on the Christmas fun!


Printable Christmas Puppets 


If you would like to keep your kids busy, you can use the pdf files. Then let them cut out each character! Otherwise (or if you have small children) you can download the png files. Png files are usable in most cutting machines. Just use the print then cut feature. These are zip files. If you are unsure how to unzip them, you can find directions here from Microsoft support.

The reindeer and gingerbread man are symmetrical so you will just print 2 copies of the same page. All the other characters are mirrored so when you glue one picture to each side of a craft stick they will match up. It works best to print on cardstock but you could also print on plain copy paper. (In the picture above I printed the elf on paper and it didn't turn out as nicely as the others!) Each puppet measures about 5 inches tall.

Once the puppets are cut, use glitter, buttons, sequins or other fun craft items to decorate them. Then use a craft stick or pipe cleaner for the handle and glue a matching puppet face to each side. 

Use a cardboard box or a tabletop for the stage and let your kids use their imaginations!


DIY Angel Ornament

Merry Christmas and welcome to the 25 Days of Christmas Blog Hop and my diy angel ornament tutorial! This blog hop features one of my favorite things about the Christmas season - Christmas movies! 


It's the most wonderful time of the year - time for the annual 25 Days Of Christmas Movies Blog Hop! #ChristmasMoviesHop


We have 25 talented bloggers gathered together to share with you all the wonderful crafts and recipes you can make this Christmas season, based off of some of the most beloved holiday classic films. There are 25 films to be inspired by for your holiday season, and 25 talented bloggers to aid your inspiration! If you love Christmas movies, you have come to the right place!!


Let’s Meet The Hosts!


Megan ~ C’mon Get Crafty | Marie ~ The Inspiration Vault | Carmen ~ Gross to Grandiose


Christine ~ My Kitchen My Craft | Crissy ~ It's a Wonderful Life | Emily ~ Domestic Deadline


Stephanie ~ The Tip Toe Fairy | Rebecca ~ The Moments at Home | Marianne ~ Songbird


Ashley ~ Attempts at Domestication | Sue ~ A Purdy Little House | Roseann ~ This Autoimmune Life


Kim ~ Kimspireddiy | Jaime ~ Love Jaime | Terri ~ Christmas Tree Lane |Lyne ~ The Paper Addict


Nicole ~ For the the Love of Food | Marie ~ DIY Adulation | Paula ~ Paula Tisch


Lara~ Love on a Plate | Jaclyn ~ The Dotted Nest


DIY Angel Ornament Tutorial from www.thisautoimmunelife.com 

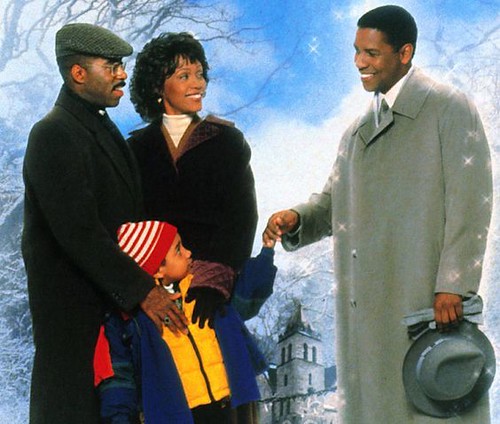
Movies with angels have always been a favorite of mine. The Preacher's Wife is one of those movies. The Preacher's Wife is a remake of the 1947 classic The Bishop's Wife starring Cary Grant. It stars Denzel Washington, Whitney Houston and Courtney B. Vance as the main characters. In this feel good movie, Reverend Biggs is having trouble with his marriage. In addition his church is being threatened by the property developer.  With desperation, Reverend Biggs prays to God for help - and help arrives in the form of an angel named Dudley. Although Dudley begins to fall for Rev. Biggs' wife Julia, in the end the uplifting message about family and faith shines through. 

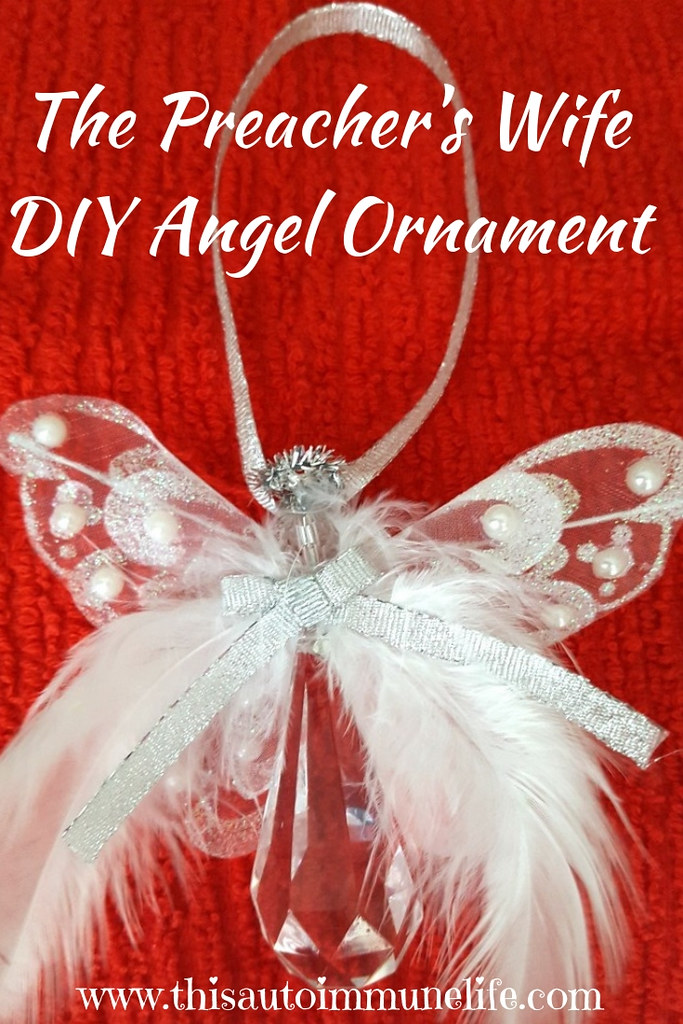
To share my love of angels, I created this angel ornament.

Angel Ornament


Materials (makes 3):

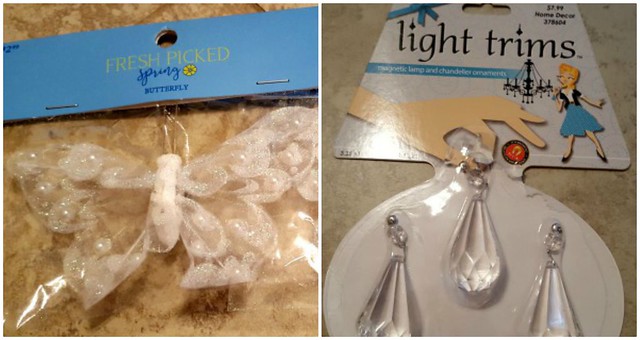
3 Lacy Butterflies (purchased from Joann from spring clearance)
1 package crystal light trim chandelier ornaments (purchased from Hobby Lobby)
Silver pipe cleaner
1 yard silver ribbon
6 white feathers

Angel Ornament Materials 
Directions:

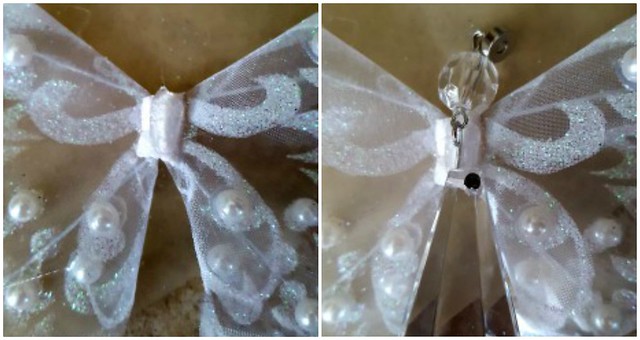
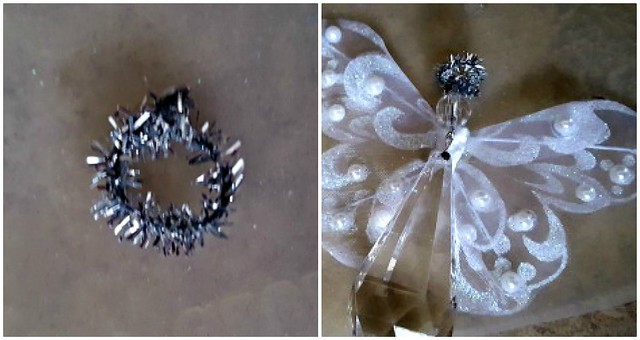
Take the body off of the butterfly. Glue (with hot glue) the wings to the back of the crystal trim along the metal piece holding the 2 beads together. 

Angel Ornament Step 1 

Make a halo out of a small piece of the silver pipe cleaner. Glue it to the top above the "head" bead. 

Angel Ornament Step 2 

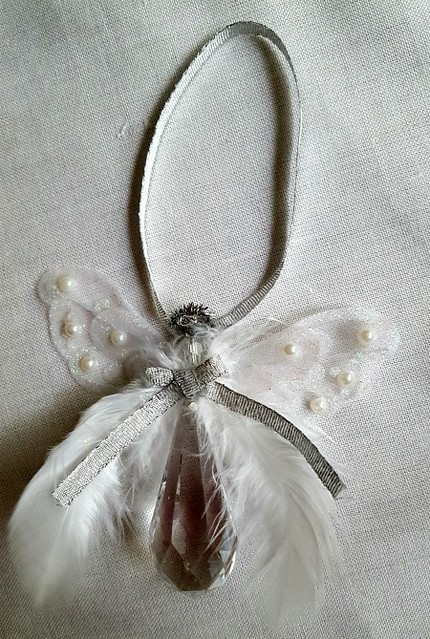
Use 2 of the white feathers and glue the ends on the front of the ornament just underneath the head. Tie a bow with the silver ribbon and glue it over the ends of the feathers to cover them. Use another piece of the silver ribbon to make a hanger. Glue it to the back of the head.

Angel Ornament 7 

Repeat 2 more times with the remaining materials. You will have 3 beautiful angel ornaments!


The Preacher's Wife DIY Angel Ornament Pinterest 


Fabric Scrap Christmas Tree Garland

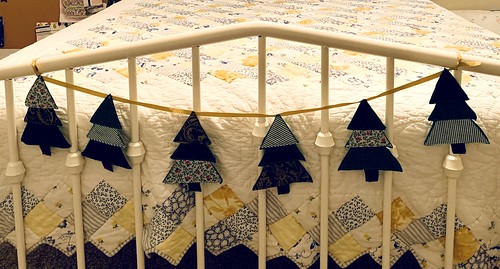
Welcome to the November Pinterest Challenge Blog Hop!  The purpose of this Pinterest Challenge is to motivate all the participants of this hop (and you too) to not just pin, but to make it happen! This month, I chose to make a Fabric Scrap Christmas Tree Garland. My inspiration came from this pin from Crafting Cheerfully.


Fabric Scrap Christmas Tree Garland


Materials:

Christmas tree pattern from Crafting Cheerfully (or you can make your own)
Green felt - 1 large sheet or 2 small
Scraps of fabric in green as well as brown
Fabric glue
Contrasting thread or embroidery floss
Ribbon or twine

Directions:

Print and cut out Christmas tree pattern. I traced it on a piece of cardboard to use as my template. Use the template to cut trees out of the felt. This will be your backing.
Then I made a template for each section of the tree. Using 6 different fabrics, I cut one of each section of the tree from each fabric. I also used the brown fabric to cut small rectangles for the trunk.
fabric scrap christmas tree garland 5 

Starting with the trunk and working your way up the tree, use a small amount of fabric glue to adhere each section of fabric to the felt.

If you don't like sewing you could add extra fabric glue and stop here, attaching each tree to the ribbon with hot glue.

I used a gold thread in my sewing machine and stitched around each section of the tree. You could also use embroidery thread and sew around the edges - totally up to you!

I spaced my trees out about 8" apart on the ribbon then sewed them on with the gold thread. 

This is a really quick little project that you can do with your kids! I hung the garland on the footboard of my daughter's bed  to make it a little more festive when she comes to visit!

fabric scrap christmas tree garland 6 


Fabric Scrap Christmas Tree Garland from www.thisautoimmunelife.com #PinterestChallenge #Christmas #ChristmasTree #ChristmasGarland #FabricScraps


Thanksgiving Baby Outfit

Are you getting ready for Thanksgiving? Get your little one ready as well with this Thanksgiving Baby Outfit. Just  click here to access your free Cricut Design Space file. 

Thanksgiving Baby Outfit


Thanksgiving Baby Outfit

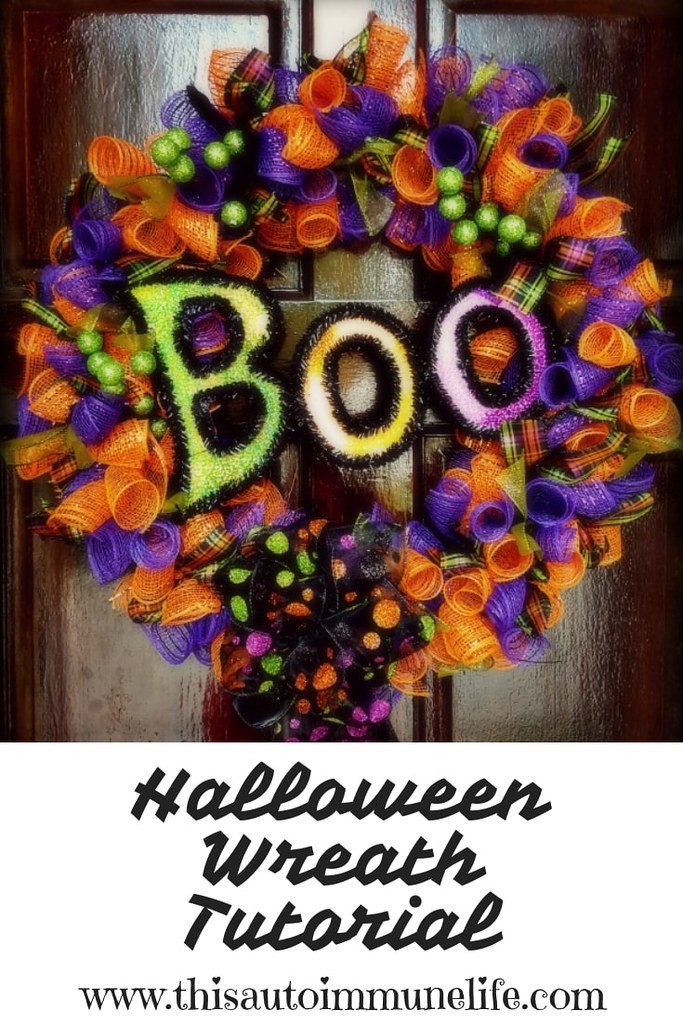
Halloween Wreath Tutorial

Halloween Wreath Tutorial


Halloween will be here before you know it! Decorating for Halloween can be so much fun. Decorative mesh wreaths have become a really popular way to decorate over the last few years. However, purchasing a pre-made wreath can be quite expensive - $50 or more!  For under $15 and a few hours of your time you can make your own. Give this Halloween Wreath Tutorial a try to add color to your door without adding the expense of a pre-made one.


Materials:


18" wire wreath frame

orange and purple decorative mesh rolls

25 pipe cleaners (I used black)

Halloween ribbon -

  1 roll plaid 

  1 roll green glitter

  1 roll  dots

"boo" sign from the dollar store

other decorations of choice
Instructions: 


  1. Gather materials. If desired, use pipe cleaners to wrap around metal wreath frame. This prevents the bow bundles from slipping.Halloween Wreath

  2. To start, cut decorative mesh into 10 inch pieces then cut plaid and green ribbon to the width of the decorative mesh. Mine was 5 inches wide so that is how long I cut the ribbon. It took me about 30 "bow bundles" to make this wreath. So you will cut 30 orange mesh, 30 purple mesh, 30 plaid ribbon and 30 green ribbon pieces. Then cut 15 pipe cleaners in half to make 30 pipe cleaner pieces.Halloween Wreath

  3. Roll 1 piece of orange mesh (use the natural curl of the ribbon) and 1 piece of purple mesh. Pinch them together in the middle. Then add 1 piece of plaid ribbon. I did 20 of these then I made 10 with the green glitter ribbon.Halloween WreathHalloween Wreath Tutorial

  4. While everything is pinched, use 1 piece of the pipe cleaner to wrap around the middle where the ribbon is pinched together. As you make them, lay them on the wreath form to make sure you have enough.Halloween Wreath TutorialHalloween Wreath Tutorial

  5. When you have enough start attaching them to the wreath form by wrapping the ends of the pipe cleaner around the form.

  6. To attach the "Boo" sign just use a little bit of hot glue and place it on the ribbon. Attach any other decorative items you have.

  7. Finally, make a large bow from the dot ribbon. Use this video if you need help making the bow.


Happy Halloween!


Halloween Wreath Tutorial from www.thisautoimmunelife.com #Halloween #wreath #tutorial

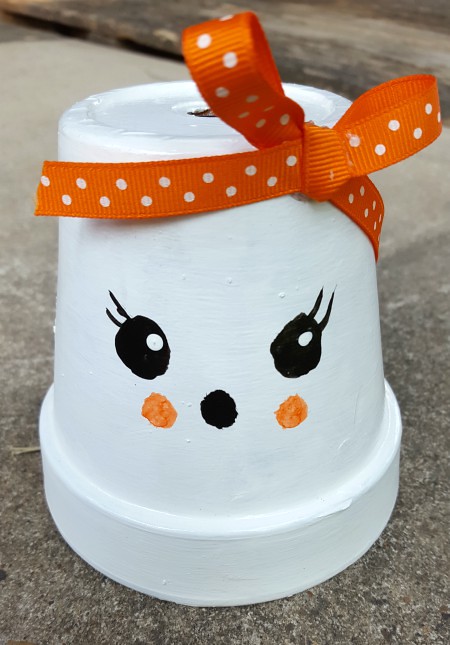
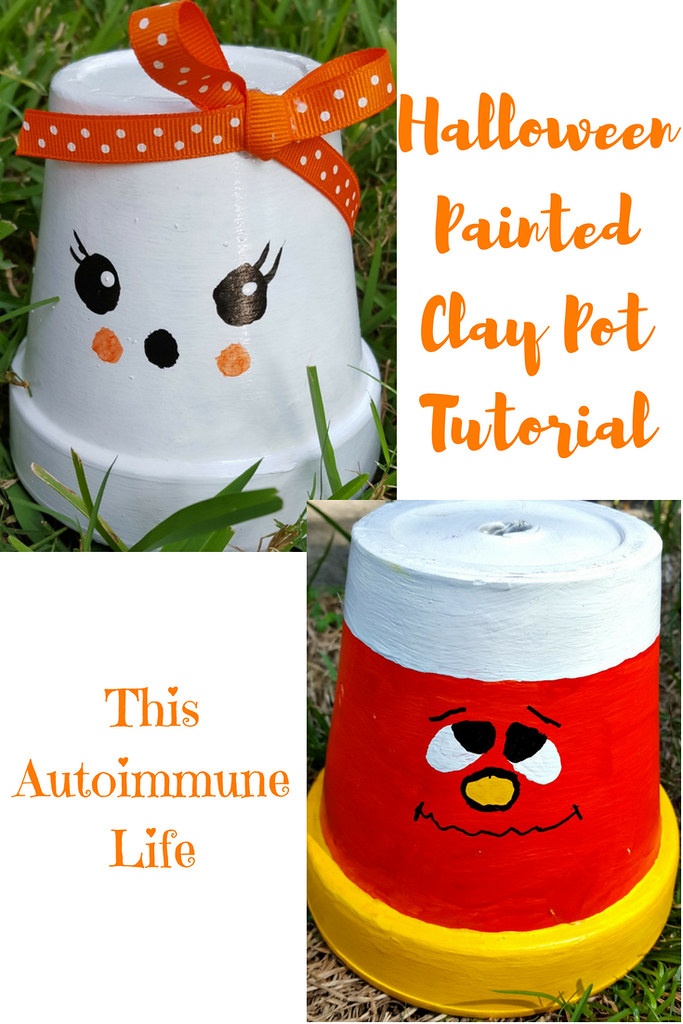
Halloween Painted Clay Pot Tutorial

Halloween will be here before we know it!  Do you love to decorate for Halloween? If so, you can create these cute pots to add to your decor. Just follow this easy Halloween Painted Clay Pot Tutorial! 

Halloween Painted Clay Pot Tutorial


Materials:


Clay pot (I used 6" for ghost and 12" for candy corn)
Primer 
Foam paint brush
Small paint brush for face details
Craft Paints - white, orange, yellow and black
Sealer
Ribbon 

Instructions for the ghost and candy corn:

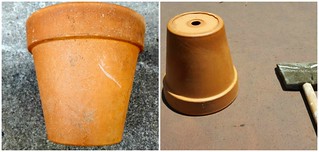
Clean pot with soap and water. Allow to dry completely. I let mine sit in the sun for several hours.

halloween pot tutorial 

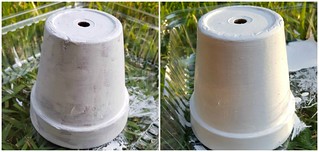
Use a primer to paint the pot. I used Kilz because that is what I had. Be sure to paint both the inside and outside of the pot if you plan to use the pot outside. Allow the primer to dry according to the directions on the product you use. Then, using the white paint, paint several coats to completely cover the pot.

halloween clay pot tutorial 
For the ghost:

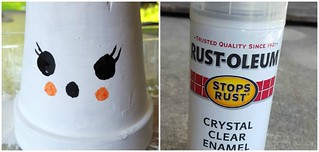
Add some round eyes with the black paint. Also add a round mouth. In addition, if you want your ghost to be a girl, add some cute eye lashes. When the black is dry add some white highlights to the eyes. For the cheeks I added a little water to the orange then dabbed it on. After all the paint has dried, spray both the inside and outside of the pot with a sealer.

halloween clay pot tutorial from www.thisautoimmunelife.com 

Finally, I added a bow for my little girl ghost. There was a crack at the top so this was a great way to hide it!

Halloween painted clay pot tutorial from www.thisautoimmunelife.com
For the candy corn:

With the pot sitting on the rim, place a piece of painters tape about 2 inches down from the top. Also tape the rim of the pot. Paint everything in between the painter's tape with the orange paint. It may require 2 coats.

After the orange paint dries, remove the painter's tape. Add a piece of painters tape to the bottom of the orange section. Paint the bottom rim with the yellow paint. Remove the painter's tape when the yellow has dried.

Use white paint to create two oval eyes. Also add a round yellow nose. When those dry, use black to add pupils to the eyes and outline the nose. Also use black to create eyebrows and a mouth. After everything has dried, spray both the inside and outside of the pot with sealer.

Happy Halloween!


PaintedClay Pot Tutorial for September Pinterest Challenge from www.thisautoimmunelife.com


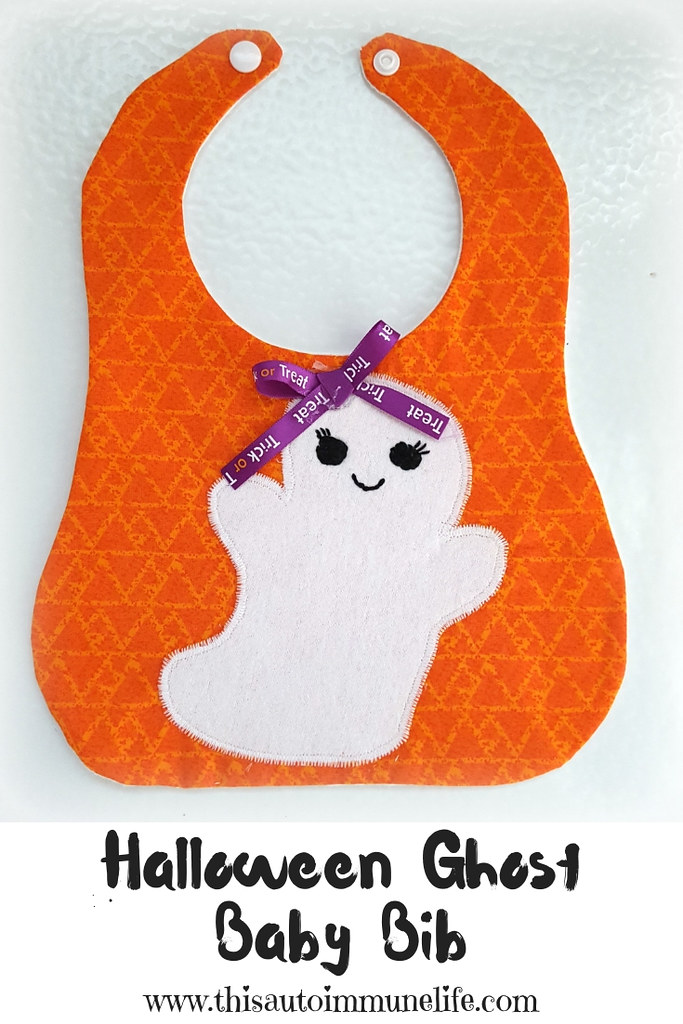
Halloween Ghost Baby Bib

Are you ready for Halloween? This month I am sharing how to create your own Halloween Ghost Baby Bib to add some festive flair to your little one!


Halloween Ghost Baby Bib for September Monthly Craft Destash Challenge from www.thisautoimmunelife.com

Halloween Ghost Baby Bib


Materials:

¼ yard orange colored fabric
¼ yard flannel
6" x 6" piece of white fabric

small piece of Heat and Bond Lite
small piece of fusible interfacing

Babyville snaps

black embroidery floss


Directions:

Part 1

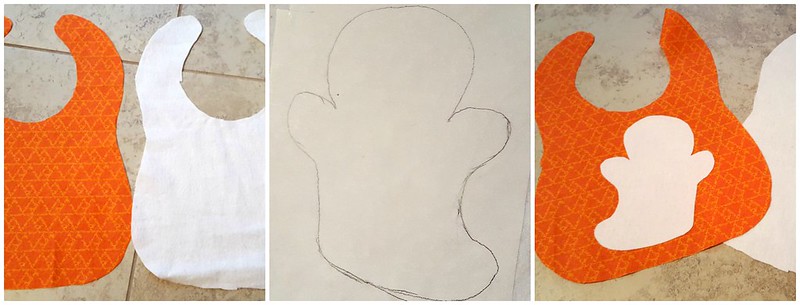
1. Using the pattern (or any pattern of your choice), cut 1 bib from the orange fabric and 1 bib from the flannel.

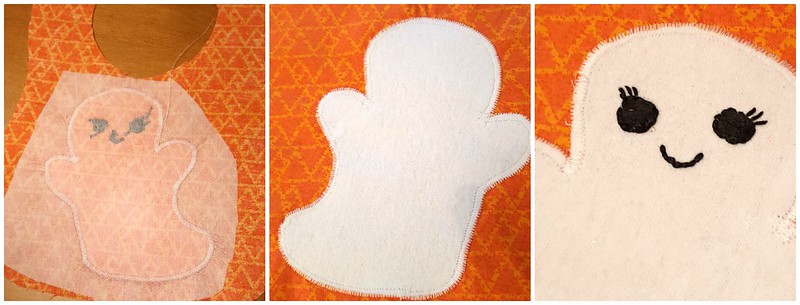
2. Trace the ghost pattern on paper side of Heat and Bond Lite. The ghost should be a little less than 6" x 6". Make sure you are using the Lite product if you are sewing your applique on your sewing machine. If you use a heavier one it can gunk up your needle. Follow the directions to iron the Heat and Bond to the wrong side of the white piece of fabric. Then cut out the ghost.

3. Iron the ghost to the right side of the orange fabric following the directions on your package. 

Baby Ghost Bib 11

Part 2

4. Cut out a piece of fusible interfacing to cover the ghost with about a 1" margin all the way around. Iron it on the back side of the orange fabric. This will keep your fabric from puckering when you applique.

5. Using the zigzag stitch on your sewing machine, sew all the way around the outside edge of the ghost. 

6. For the ghost's mouth and eyes use 3 strands of the black embroidery floss. Sew a stem stitch in a semi-circle for the mouth. For the eyes, use a back stitch to outline the circles then fill in with a satin stitch. Then just add some straight stitches if you want your ghost to be a girl.

Baby Ghost Bib Tutorial from www.thisautoimmunelife.com

Part 3


7. Place the orange fabric and flannel fabrics right sides together. Sew around the outside edge with a zigzag stitch leaving about a 2" opening along the bottom for turning. Clip curves then turn right side out. Iron along the edge then sew the opening along the bottom closed with either your machine or hand stitching.


Baby Ghost Bib Tutorial from www.thisautoimmunelife.com

8. Add a snap to each side of the top of the bib. You could also add Velcro or a button for securing the bib. 


Halloween Ghost Baby Bib Tutorial from www.thisautoimmunelife.com #Halloween #Baby #Bib

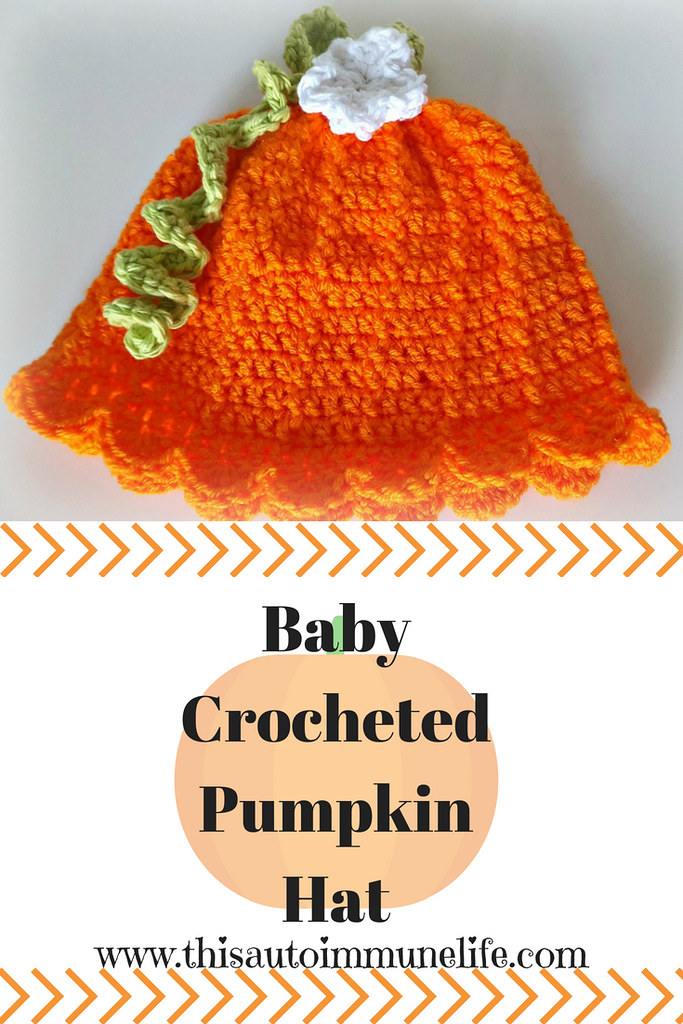
Cute Baby Crocheted Pumpkin Hat

 This Cute Baby Crocheted Pumpkin Hat pattern is a great project for fall. The pattern is shared by Loganberry Handmade


Cute Baby Crocheted Pumpkin Hat


Materials:

1 skein lightweight orange yarn
small amount of green and white yarn
crochet hook size h

The hat is worked in 5 parts - the hat, vine, stem, leaf and flower. Then you sew all the pieces together. It is relatively easy to make. The only stitch I was not familiar with was the front post double crochet. So of course I googled it and followed these directions.  There are also plenty of youtube videos to show you how.

The size is for 6-12 months. Because this is for my granddaughter it is the perfect size as she will be 6 months old in the fall. And the cute scallops gives it that added touch that make it perfect for a little girl!

So, stop by Loganberry Handmade to get the free pattern! Then you too can make this cute hat!
Looking for other cute baby crocheted hats? Click here

BabyCrochetedPumpkinHat Pinterest 


Quilt As You Go Halloween Quilt

This Quilt As You Go Halloween Quilt was inspired from this pin from The Seasoned Homemaker.

Quilt As You Go Halloween Quilt from www.thisautoimmunelife.com #pinterestchallenge #Halloween #Quilt


Halloween Quilt


With a quilt as you go quilt, you add the batting and quilt the individual pieces before adding the backing. This makes it much easier to put together with a regular sewing machine. I used larger size pieces because I had a charm pack that I wanted to use up. But the directions are basically the same. 

Here are the materials I used:

1 pack Halloween charm squares (approx 42 5" x 5" squares)
2 each fat quarter in white, purple and black
Scraps of fabric for candy corn and bat appliques
Steam A Seam Lite sheets - I used these to iron down my appliques
Batting
1 ½ yards backing fabric
Small piece of white ricrac
2 packages Wright's seam binding

Directions:

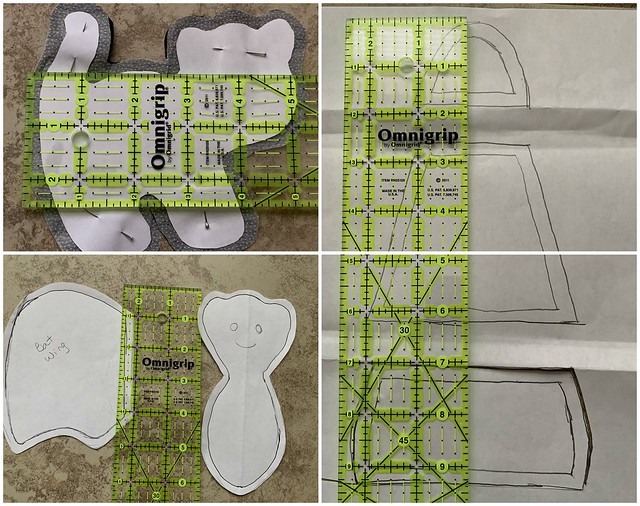
Follow the basic directions found at The Seasoned Homemaker website. Just know this quilt will be larger. Also, I used premade seam binding instead of binding with the backing fabric.  I just free handed my Halloween appliques. Here is a picture with the sizes. 

Halloween Quilt Appliques 

This was fun to make and didn't take too long. It is a great quilt to use up some scraps you might have laying around! I've been using it as a lap quilt but it could also be used as a wall hanging instead.


Quilt As You Go Halloween Quilt from www.thisautoimmunelife.com #pinterestchallenge #Halloween #Quilt

Search This Blog

Powered by Blogger.