It's the most wonderful time of the year - time for the annual 25 Days Of Christmas Movies Blog Hop! #ChristmasMoviesHop
We have 25 talented bloggers gathered together to share with you all the wonderful crafts and recipes you can make this Christmas season, based off of some of the most beloved holiday classic films. There are 25 films to be inspired by for your holiday season, and 25 talented bloggers to aid your inspiration! If you love Christmas movies, you have come to the right place!!
Let’s Meet The Hosts!
Megan ~ C’mon Get Crafty | Marie ~ The Inspiration Vault | Carmen ~ Gross to Grandiose
Christine ~ My Kitchen My Craft | Crissy ~ It's a Wonderful Life | Emily ~ Domestic Deadline
Stephanie ~ The Tip Toe Fairy | Rebecca ~ The Moments at Home | Marianne ~ Songbird
Ashley ~ Attempts at Domestication | Sue ~ A Purdy Little House | Roseann ~ This Autoimmune Life
Kim ~ Kimspireddiy | Jaime ~ Love Jaime | Terri ~ Christmas Tree Lane |Lyne ~ The Paper Addict
Nicole ~ For the the Love of Food | Marie ~ DIY Adulation | Paula ~ Paula Tisch
Lara~ Love on a Plate | Jaclyn ~ The Dotted Nest
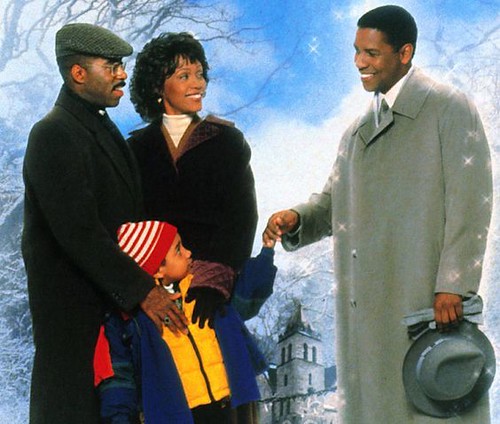
Movies with angels have always been a favorite of mine. The Preacher's Wife is one of those movies. The Preacher's Wife is a remake of the 1947 classic The Bishop's Wife starring Cary Grant. It stars Denzel Washington, Whitney Houston and Courtney B. Vance as the main characters. In this feel good movie, Reverend Biggs is having trouble with his marriage. In addition his church is being threatened by the property developer. With desperation, Reverend Biggs prays to God for help - and help arrives in the form of an angel named Dudley. Although Dudley begins to fall for Rev. Biggs' wife Julia, in the end the uplifting message about family and faith shines through.
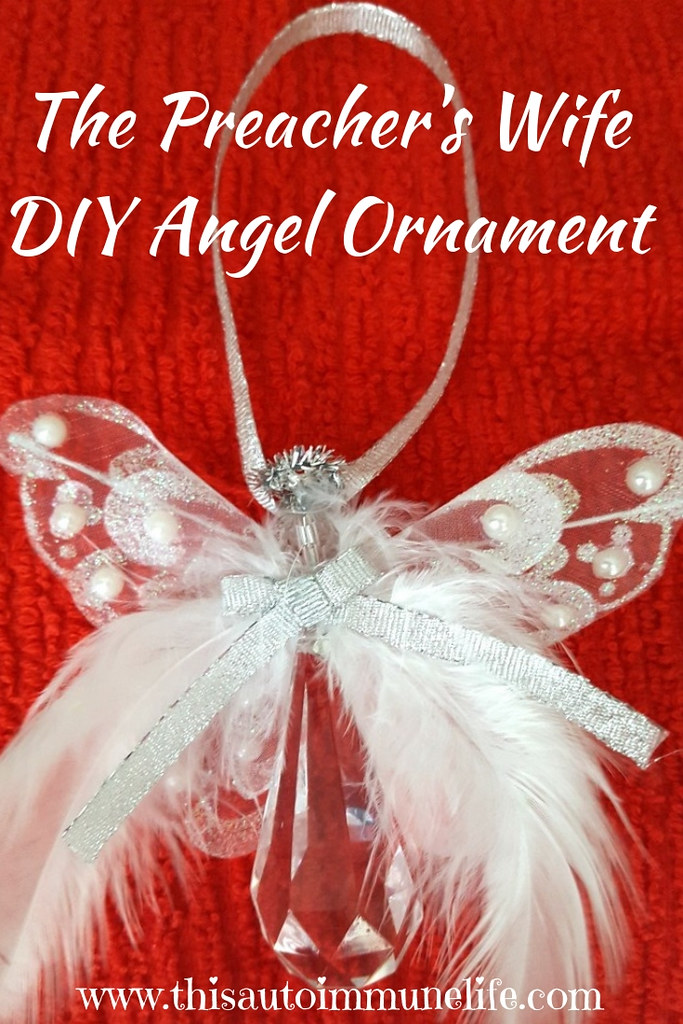
To share my love of angels, I created this angel ornament.
Angel Ornament
Materials (makes 3):
3 Lacy Butterflies (purchased from Joann from spring clearance)
1 package crystal light trim chandelier ornaments (purchased from Hobby Lobby)
Silver pipe cleaner
1 yard silver ribbon
6 white feathers
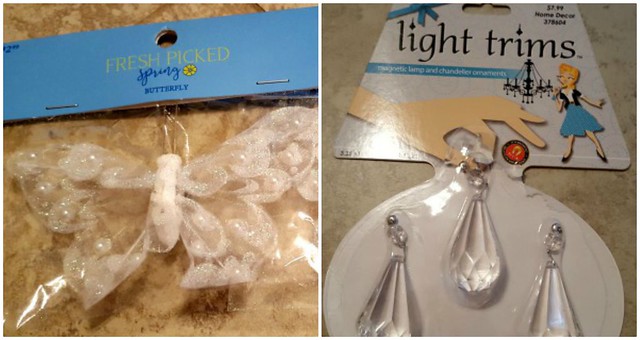
Directions:
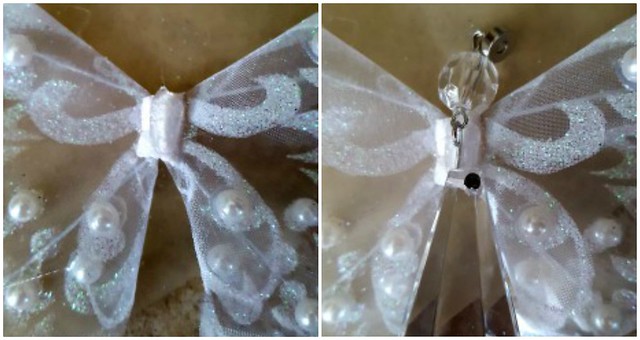
Take the body off of the butterfly. Glue (with hot glue) the wings to the back of the crystal trim along the metal piece holding the 2 beads together.
Make a halo out of a small piece of the silver pipe cleaner. Glue it to the top above the "head" bead.
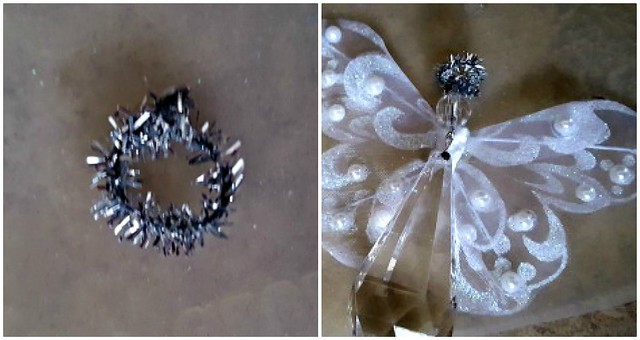
Use 2 of the white feathers and glue the ends on the front of the ornament just underneath the head. Tie a bow with the silver ribbon and glue it over the ends of the feathers to cover them. Use another piece of the silver ribbon to make a hanger. Glue it to the back of the head.
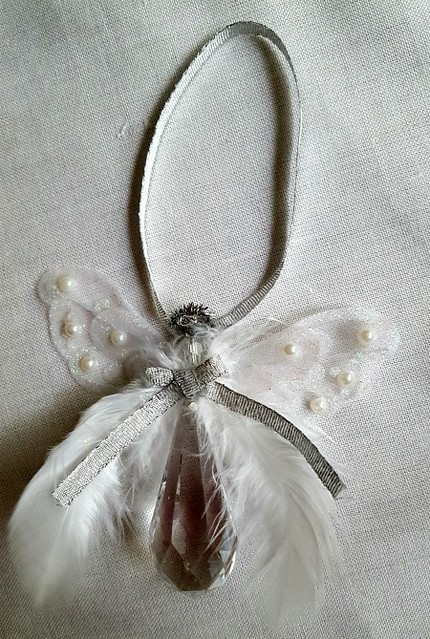
Repeat 2 more times with the remaining materials. You will have 3 beautiful angel ornaments!