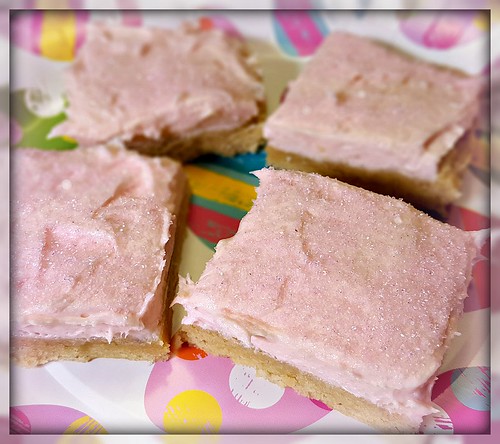
Easy Sugar Cookie Bars

Welcome to the April Pinterest Challenge Blog Hop! The purpose of this Pinterest Challenge is to motivate all the participants of this hop (and you too) to not just pin, but to make it happen! So this month, I chose to make Easy Sugar Cookie Bars


To join next month's #pinterestchallenge, click here to sign-up ⇒ May Pinterest Challenge

Sugar Cookie Bars 

Sugar Cookie Bars


My daughter had sent me a pin last year to make sugar cookie bars for when she came to visit. I didn't get the chance then so I made them for her when she came home for Easter a few weeks ago. The recipe made a 13 x 9 pan so I cut the recipe in half because I was also making an Oreo cheesecake for my son and didn't want a bunch of leftovers since I don't eat sugar. I made them in a 8 x 8 pan and the cookie bars came out fairly thin. I suppose I should have made the whole recipe and just put some in the freezer. But with the icing added on top she said they were really good so I guess all in all it was a success! 

INGREDIENTS:


For the cookie:

1 cup butter, softened
8 oz cream cheese, softened
1½ cups sugar
1 egg
2 teaspoons vanilla extract
2½ cups flour
1 teaspoon baking powder
½ tsp baking soda

For the frosting:

3/4 cup salted butter, room temperature
3 cups powdered sugar
1 teaspoon vanilla extract
3-4 tablespoons heavy cream
sprinkles


Here is the link the the pin where the original recipe is found. You can find the directions there.

Easy Sugar Cookie Bars


Now let's see what other things Pinterest inspired! Head over and visit the other hosts to see what they crafted, cooked, built, or tried!


Pinterest Challenge Blog Hop

Participants:


Erlene - My Pinterventures • Lauren - Mom Home Guide
Debbee - Debbee's Buzz • Laurie - My Husband Has Too Many Hobbies
Marie - DIY Adulation • Julie - Sum of their Stories
Marie - The Inspiration Vault • T'onna - Sew Crafty Crochet
Pili - My Sweet Things • Debra - Shoppe No. 5
Roseann - This Autoimmune Life • Terri - Our Good Life
Lisa - Blogghetti • Marci - Stone Cottage Adventures
Leslie - Once Upon a Time & Happily Ever After
Rebecca - Simple Practical Beautiful • Cherryl - Farm Girl Reformed
Kelley - Simply Inspired Meals • Joanne - Our Unschooling Journey
Jenny - Cookies Coffee and Crafts • Gail - Purple Hues and Me
Sam - Raggedy Bits
Beverly - Across the Boulevard • Samantha - Little Bits of Home
Kristie - Teadoddles • Shirley - Intelligent Domestications
Kelli - Olympic Nest • Chelsea - Making Manzanita
Cherryl - Farm Girl Reformed • Ola - J'adore Le Decor


How To Print on Fabric

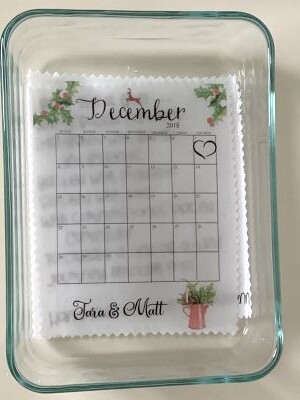
Would you like to make fabric tags to put on quilts? Or perhaps to use as a clothing label? Well once you learn How To Print On Fabric you can do both of those things! 

How to Print on Fabric


How To Print On Fabric


Materials:

Freezer Paper
White Fabric
Printer
Iron
Vinegar
Shallow Bowl
Steps:

Cut a piece of freezer paper to fit in your printer. You can use a piece of printer paper and trace around it to make sure you have the correct size. 

Iron the freezer paper onto the white fabric (one side feels more waxy, that side will go on the fabric) then trim the fabric to the same size as the freezer paper. Make sure there are no frayed ends on the fabric to get stuck in your printer!

How To Print On Fabric Collage 

Take the freezer paper and put it in your printer. For my printer I put the side I want printed on face down. So I put the fabric side face down.

Go to your computer and print the design you would like. 

Occasionally it will come out smeared. Just try again. The picture above took me 2 attempts! After it comes out, carefully peel off the freezer paper from the fabric being careful not to smudge the ink. 

How To Print On Fabric 1 

Fill a shallow bowl with vinegar - just enough to cover the fabric. Set your printed fabric in the bowl and let it sit for 5-10 minutes to set the ink. 

How To Print On Fabric 2 

After you take it out of the vinegar, rinse with cold water to get out the vinegar smell. You can either lay it flat to dry or you can use a hair dryer to speed up the process. 

I use some pinking shears to cut around the picture then I sew it on to my project. If it's a quilt I usually use my sewing machine but if it's clothing I hand stitch it on.


Search This Blog

Powered by Blogger.