Coconut Cream Pie is one of those desserts that seems perfect for the spring and summer months! However, for a coconut lover like me, it is certainly good any time of the year! I adapted this recipe from one posted on Today’s Mama to make it more allergy friendly. It does have almond flour in the crust but you could easily make a crust with all coconut flour.
Basic Directions:
Put all the dry ingredients for the crust in a food processor then pulse to mix. Next, add all the wet ingredients and run processor until well combined.
Press all the ingredients into the bottom and up the sides of a pie pan and bake.
While the crust is baking, mix coconut with stevia then toast it for your topping.
Make your custard.
Let everything cool and add custard to crust then sprinkle with toasted coconut! Finally, enjoy!
What is your favorite kind of pie? Leave a comment!
Summer is a very welcome time in my life. After 9 months of teaching I can finally get enough sleep to not feel exhausted every day! And it’s blueberry picking time in Texas! I went to Moorhead’s Blueberry Farmthis weekend with a friend from work. I picked just around 7 pounds of deliciously sweet organic blueberries to make these Gluten Free Blueberry Muffins!
In the constant battle I face with candida overgrowth I don’t eat any refined sugar and I also limit my overall sugar and carb intake. Berries are one of the fruits I eat because they are low in sugar, 7.4 grams per 1/2 cup (although they are a little higher than strawberries which have 3.5 grams per 1/2 cup). Most of the carbs in blueberries is fiber, approximately 2 grams per 1/2 cup. Blueberries also contain a wide range of phytochemicals which are believed to give them antioxidant and anti-inflammatory properties. This is an added benefit in helping with my autoimmune diseases! To read more about the health benefits of blueberries, check out this article by Dr. Axe – 7 Health Benefits of Blueberries.
With all these blueberries I had to do some baking. I made a regular batch of blueberry muffins for my husband for father’s day using this recipe found at the “Oh My Goodness Chocolate Desserts” blog. I then modified the recipe to make it gluten and refined sugar free. It is mostly dairy free except for the fact that I used butter for the streusel topping. My sensitivity to dairy is mainly linked to the protein in dairy. Since butter is the fat that has been isolated from the protein and carbs my body can usually tolerate it.
Gluten Free/Sugar Free Blueberry Muffins with Streusel Topping
Ingredients
For the Muffins:
2 cups + 1 tablespoon gluten free flour blend (I use King Arthur)
Preheat your oven to 400° and line your muffin tin with paper liners.
Make the crumb topping by mixing together the flours, splenda and cinnamon in a small bowl. Pour in the melted butter and stir until crumbly.
To make muffins, stir together 2 cups flour, baking powder, salt and xanthan gum in a large bowl.
In a separate bowl mix the splenda with the eggs. Then add the stevia. Whisk in yogurt, oil and vanilla.
Fold wet ingredients into the bowl with the dry ingredients. Stir gently just until dry ingredients are wet.
Mix 1 1/2 cups of blueberries with the 1 tablespoon flour. Then gently fold them into the batter.
Spoon batter into muffin tin until the batter is almost to the top of the liner. Top with the extra blueberries and then the streusel. Gently push the topping into the muffin batter.
Place the muffin tin in the oven and reduce the temperature to 375°. Bake for 22-25 minutes or until they are lightly browned on top and a toothpick comes out clean.
Let muffins cool in the pan for about 10 minutes then remove them to a wire rack.
According to Authority Nutrition, here are the top 12 reasons to eat avocados:
Avocados are incredibly nutritious
They contain more potassium than bananas
They are loaded with heart-healthy monounsaturated fatty acids
They are loaded with fiber
Eating them can lower cholesterol and triglyceride levels
People who eat avocados tend to be healthier
The fat in them can help you absorb nutrients from plant foods
They are loaded with powerful antioxidants
They may help prevent cancer
They may help relieve the symptoms of arthritis
They may help you lose weight
They are delicious
Guacamole Recipe
3 large avocados
¼ cup chopped onions
2-3 cloves garlic, chopped
¹/3 cup chopped tomatoes
1 teaspoon dried cilantro (or fresh equivalent)
½-¾ teaspoon salt
dash of red (cayenne) pepper
juice of ½ lime
Using a sharp knife, slice avocado in half lengthwise. Remove the pit with a spoon. Use the spoon to scoop the avocado out of the peel and into a bowl. Mash the avocado. I have a hand masher but you could use a fork as well. Mash it to the consistency your prefer. I prefer creamy but you could also leave it chunky. Add the onion, garlic, tomato, cilantro, salt and red pepper. Stir to combine. Add the lime juice and stir to mix it in. Cover and put in the refrigerator. You can eat it right away but it tastes better when left to sit for and hour or two to let the flavors meld.
If you like to decorate your planner here are some free Halloween Planner Stickers. I’m not one who likes the scary and gory part of Halloween. And I am certainly not honoring the pagan devil worshiping celebration of Samhain. I prefer to decorate with my cute candy corn dolls and happy smiling pumpkins. My kids used to like to dress up but it was always princesses and pokemonor other cartoon characters. Now that they are grown I enjoy handing out candy to the neighborhood children. And I certainly enjoy my pumpkin spice flavored foods! What do you enjoy about Halloween?
Here are some interesting Halloween facts (if you would like to read more, click here):
Halloween candy accounts for one quarter of the candy sold in the U.S. annually
The first jack-o-lanterns were made from turnips
The largest pumpkin on record is 836 pounds
In 2014 an estimated $3 billion was spent on children’s costumes
Candy corn was invented in 1898
Halloween is the second largest commercial holiday after Christmas
Just click on the picture below to get your free sticker download. It is a png file which can be used with the Cricut or cut by hand.
I got a text from my daughter at the beginning of summer - "Mom, if you are not too busy this summer I have a few projects for you to do". My daughter teaches pre-k and I teach 5th/6th grade. During the summer months I do like to work on "projects". Sewing, baking and gardening are how I like to spend my time. Milk crate seats (5 of them) for her small group table was one of the projects she asked me to make. I looked online and found quite a few websites with directions on how to make them. The only problem was all the milk crate seats seemed to have the cushion attached to a piece of wood which was then laid on the milk crate. If you've ever worked with or been around 4-5 year-olds you can see why this would be a problem. Spills, accidents, boogers ... you get the picture. The cushions I made for her classroom are both removable and washable. My daughter really liked that the crate chair cushions would be washable!
If you don't have a mom that will make milk crate seats for you, I decided to do a tutorial of my process so you can make them for yourself.
Materials for Seat Cushions -
Makes 1 removable cushion for milk crate size 15" x 13 ½"
½ yard Foam - depending on how much money you want to spend you can buy 1" or 2" thick
1 yard Cotton Material, washed and dried
5 sew-on snaps or velcro
Directions:
1. Cut foam to fit the top of the milk crate. These crates go open side down.
2.Place foam in center of fabric and trim fabric so that there is 9 inches of fabric on all sides of the foam.
3. Leave foam in center of fabric (wrong side up) and using a washable marker draw squares coming off of each corner of the foam. These squares should be 9" x 9".
4. Cut 8 strips 1" x 12" for the ties. Pin ties lengthwise right sides together and sew with a 1/8" seam across one small edge and down the length. Turn right side out. Here is a great tutorial on how to turn skinny tubes of fabric. You could also skip this step and use grosgrain ribbon for the ties.
5. Take 2 ties and pin unfinished end on right side of fabric about ¾" down from the right angle you drew.
6. Fold fabric right sides together matching the lines of the square. It will form a triangle.
7. Sew down the line. I reinforced the area where the ties are by reversing my machine back over that area.
8. Use pinking shears to trim off the extra piece of fabric that forms the triangle.
9. Press the seam open.
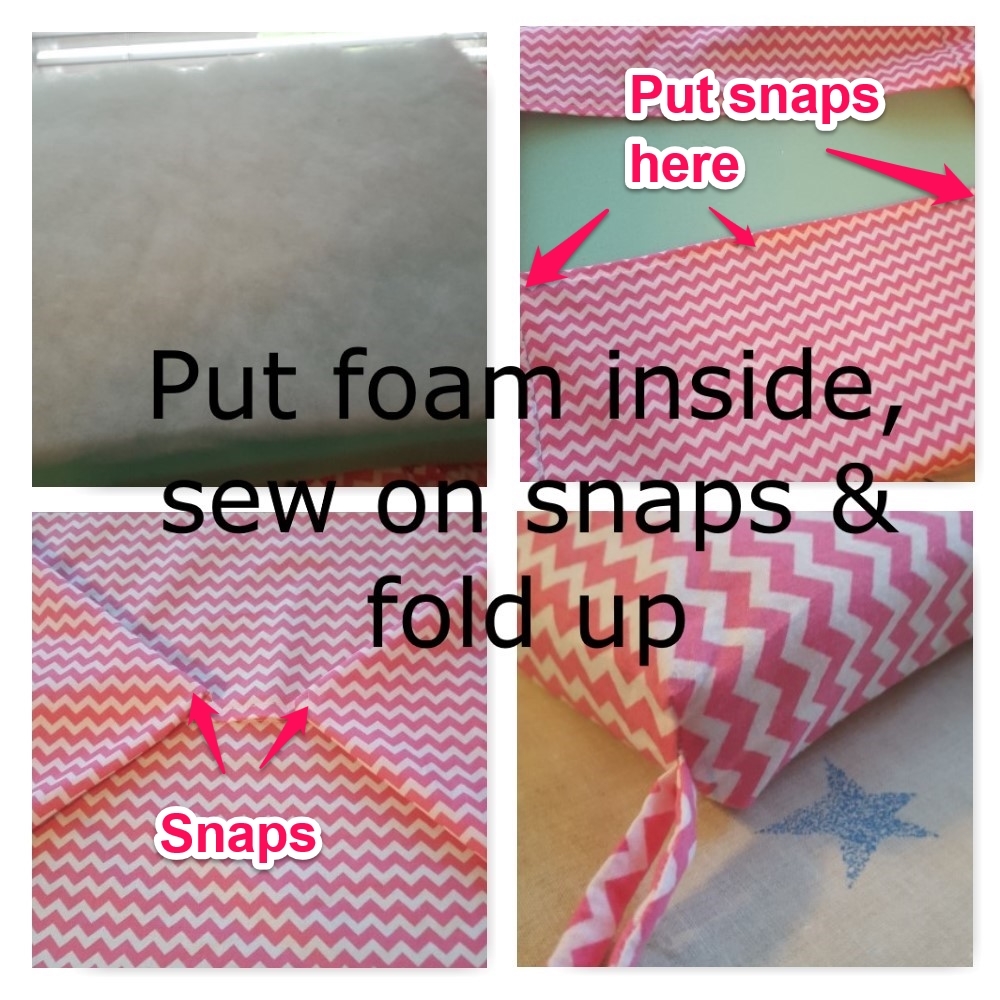
10. Make a 1" hem around all the edges. Press under 1" and then fold edge under and press that down so you have ½" seam. Sew along the edge of the inner fold.
11. I put a thin layer of batting on top of the green foam so the green didn't show through the white on the fabric. This is optional. With batting side down place foam inside fabric. Pull fabric around foam so that the top is smooth.
12. Add snaps or velcro along long edge of opening. Also add snaps to the points that fold over.
Enjoy your new milk crate seats!
Halloween is quickly approaching and the weather is getting cooler! What better way to celebrate than with this cute crocheted Halloween cat hat!
This hat will fit a toddler. You can skip the bow if you are making it for a young gentleman. The pattern comes from Crochet for You. So you can hop over to her blog for the directions.
To make the hat you will need:
1 small ball of medium weight black yarn
Small amount of orange yarn
Small amount of pink yarn
I crochet hook
H crochet hook
A tapestry needle for sewing nose, whiskers and weaving in ends
This hat works up really fast. You can easily make it in an evening then gift it to your favorite little one for Halloween!
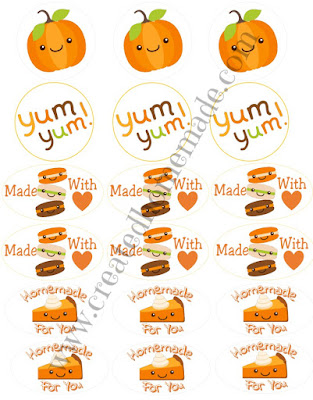
Fall is a great time for making homemade treats. If you love to bake or give homemade gifts, these Fall Inspired Homemade Labels are for you! The round ones are 2" which fits perfectly on top of a mason jar. The oval labels are perfect for the side of a mason jar or a beautifully tied cellophane bag full of treats! Just click on the picture below to access your free files. They are available in either pdf or png. Just print on sticker paper then they can be cut with your cutting machine or by hand.
These cute images were purchased at The Hungry JPEG
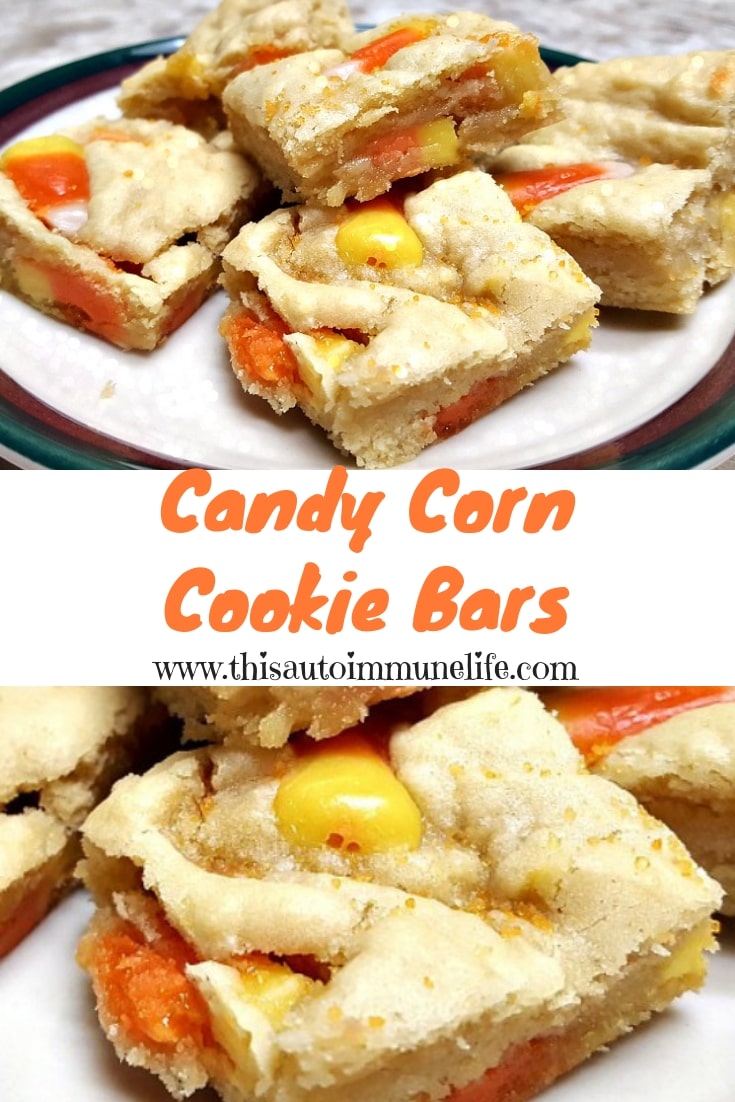
Nothing says fall like candy corn! And these Candy Corn Cookie Bars are a perfect dessert to take to a Halloween party or share with your co-workers! This delicious recipe comes from Renee at Two In The Kitchen.
Candy Corn Cookie Bars
Ingredients:
1/2 cup unsalted butter (softened) 1 cup sugar 1 teaspoon vanilla 2 eggs 2 1/2 cups flour 1/2 teaspoon salt 1/4 teaspoon baking soda 1 1/2 cups candy corn
Directions:
Preheat oven to 375. Line a 13 x 9" baking pan with foil. Then spray bottom of foil with cooking spray. In a medium size bowl, mix flour, salt and baking soda and set aside. In a large bowl, beat together butter and sugar and vanilla. Then add eggs 1 at a time beating well after each addition. Add flour mixture into wet ingredients 1 cup at a time mixing well after each addition. Mix in 1 cup of candy corn. Spread mixture into prepared pan. Sprinkle remaining candy corn on top of batter and press them down gently. Bake for 15 minutes. Remove from oven and let them cool completely before cutting. For other delicious cookie bars try these!
www.createdhomemade.com is a participant in the Amazon Services LLC Associates Program, an affiliate advertising program designed to provide a means for sites to earn advertising fees by advertising and linking to Amazon.com.
About Me
Hi I'm Roseann! Baking, sewing, crafting and creating all things homemade. So glad you came to visit!